

What a Single-Storey Extension Actually Involves
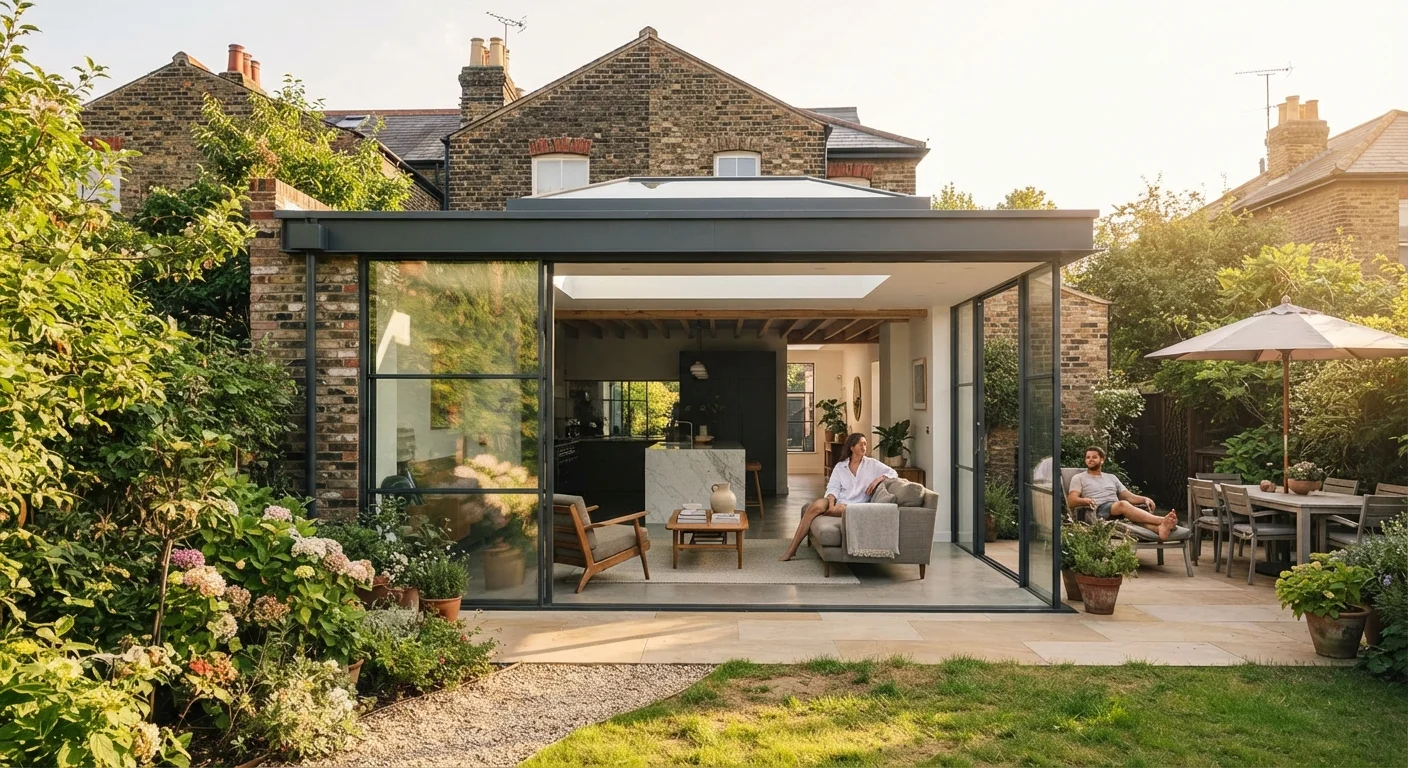
A single-storey rear extension adds a new ground-floor room - or expands an existing one - onto the back of a house. It is one of the most common home improvement projects in the UK, typically used to enlarge a kitchen, create an open-plan kitchen-diner, or add a family room that opens onto the garden.
Before any design work begins, it helps to understand the full sequence of decisions ahead. The project generally moves through four stages: establishing what planning rules allow, getting the design to meet building regulations, appointing and managing contractors, and completing the formal sign-off process. Each stage has its own dependencies, and rushing one creates problems in the next.
See our guide to planning a home renovation for a broader look at what to organise before any project begins - including budgeting, party wall considerations, and contractor vetting.
Permitted Development or Full Planning Permission?
In England, many single-storey rear extensions can be built under permitted development (PD) rights - a set of rules that allow certain works without a full planning application. The headline limits for a detached house are an extension of up to 8 metres from the original rear wall; for semi-detached and terraced homes the limit is 6 metres. Extensions between 4 and 8 metres (or 3-6 metres for semi-detached and terraced) fall under a prior approval process, where neighbours are consulted and the local authority checks for impact on amenity.
Several factors can remove or restrict PD rights entirely:
- The property is in a designated area (conservation area, Area of Outstanding Natural Beauty, National Park, or World Heritage Site), where stricter rules apply.
- PD rights have been removed by a condition attached to the original planning permission for the house.
- The extension would cover more than half the garden area (including any previous extensions).
- The extension exceeds the height limits: maximum 4 metres to the ridge for a dual-pitch roof, or 3 metres for any other roof type.
If PD rights do not apply, or if you are unsure, a lawful development certificate (LDC) from your local planning authority gives written confirmation that the works are lawful. It costs a fee but is strongly recommended - it protects you at the point of sale and removes ambiguity. Wales, Scotland, and Northern Ireland each have their own planning frameworks, so always verify the rules that apply to your specific address.
Don't Assume Permitted Development Applies
Even if your extension appears to fall within standard PD limits, local restrictions - such as an Article 4 Direction - can remove those rights for specific streets or areas. Check with your local planning authority or apply for a lawful development certificate before starting any work. Proceeding on an incorrect assumption can result in an enforcement notice requiring you to demolish the extension at your own cost.
Building Regulations: The Non-Negotiable Layer
Planning permission (or PD rights) says whether you may build; building regulations say how it must be built. Almost every extension requires building regulations approval, covering structural integrity, thermal performance (Part L), ventilation, electrical work (Part P), drainage connections, and means of escape in case of fire.
You have two routes: a full plans application, where you submit detailed drawings for approval before work starts, or a building notice, which allows work to proceed but requires an inspector to check each stage on site. Full plans give you greater certainty, especially if your design involves complex foundations or structural steelwork.
Our plain-language guide to building regulations explains what each Part covers and how inspections typically work.
A key structural element is the steel or timber beam (RSJ) that carries the load where the extension opens into the existing house. Getting the beam sizing right - confirmed by a structural engineer - is not optional. The building inspector will check it.
Design Decisions That Shape the Outcome
Once the regulatory framework is understood, the design stage is where the project takes real shape. Several decisions here have long-term consequences:
Roof type
Flat roofs cost less to build and suit contemporary aesthetics, but require vigilant maintenance and a quality waterproofing membrane. Pitched roofs are more durable and may better match an existing property - but cost more and add height. Our comparison of flat and pitched roofs for extensions covers the trade-offs in detail.
Glazing
Large glazed doors (bifold or sliding) and roof lights are popular because they bring natural light deep into the space. However, more glazing means more solar gain in summer and more heat loss in winter. Current building regulations set minimum energy performance standards for glazing - any glazing you specify must meet these. Overglazing without shading strategy is one of the most common design regrets homeowners report.
Connection to existing rooms
How the extension joins the house affects everyday flow as much as it affects structure. An open-plan connection removes a wall and requires a steel beam; it also changes acoustic separation and heating zone management. See our guide to open-plan vs. retained rooms for a practical breakdown of the trade-offs.
Commission a topographic and drainage survey before finalising your foundation design - unexpected services or poor subsoil can add significant cost if discovered mid-dig.
Ground conditions are one of the most common sources of unexpected cost on extension projects. Early survey data lets the structural engineer design appropriate foundations and avoids costly variations once work is underway.
Specify the U-values and glazing specifications in writing before contractors price the job - 'standard double glazing' can mean very different performance levels from different suppliers.
Building regulations set minimum thermal performance thresholds, but there is a wide range of compliant products at different price points. A written specification locks in the performance level you are paying for.
Managing the Build: Contractors and Timeline
A typical single-storey extension - from groundworks to plastering - takes 10-16 weeks for a straightforward build, though this varies with size, site conditions, and contractor availability. Phased inspections by the building control officer punctuate the schedule, so the programme needs to allow time for those sign-offs before the next stage proceeds.
Key contractor relationships to manage:
- Architect or designer - produces drawings for planning and building regulations. Some offer project management; others hand over after design.
- Structural engineer - required for beam calculations and, where relevant, foundation design. Usually engaged by the architect but sometimes separately.
- Main contractor or builder - coordinates trades (groundworkers, bricklayers, roofers, joiners). Clarify in writing who is responsible for subcontractor supervision.
- Separate trades - electrical and plumbing work often brought in by the main contractor, but you need to confirm this upfront.
Insist on a written contract that specifies the scope, payment schedule (milestone-based, not upfront lump sums), programme, and a process for variations. A detailed specification document - listing materials, finishes, and standards - prevents disputes about what was agreed.
Handover, Snagging, and Final Paperwork
Before making the final payment, carry out a thorough snagging inspection - a walk-through to identify defects or unfinished items. Compile a written list and agree a timeline for remediation. Reputable contractors expect this and build time for it into their programme.
The most important document at completion is the building regulations completion certificate, issued by your local authority building control (or an approved inspector) once all inspections are passed. Without it, you may face difficulties when selling or remortgaging. Also collect:
- Electrical installation certificate (Part P compliance)
- FENSA or CERTASS certificates for any replacement windows or doors
- Guarantees for the roof waterproofing system and any structural warranties
- Copies of the approved plans and any planning correspondence
File these securely - they form part of the property's legal record. If a lawful development certificate was obtained before construction, keep that too.
For ongoing upkeep of your new extension, our home maintenance hub covers seasonal checks that will help protect your investment over time.
This article provides general guidance on the home extension process in England. Planning and building regulations vary across the UK and are subject to change. Always verify current rules with your local planning authority and consult qualified professionals - including an architect, structural engineer, and building control officer - before committing to any construction work.
The content on this site is for informational purposes only and is not a substitute for professional advice. Always consult a qualified professional for guidance specific to your situation.