

How a Gutter System Actually Works
A residential gutter system has one core job: intercept rainwater as it runs off the roof and route it safely away from the house. Without gutters, that volume of water would pour directly against your foundation, erode the soil beneath your siding, and saturate the ground around your basement or crawl space - conditions that invite mold, settling, and structural damage over time.
The system works as a chain of connected parts. Roof shingles shed water toward the eaves, where the gutters (the horizontal troughs) collect it. The water then travels along a slight downward slope - called the pitch - toward downspouts, the vertical pipes that carry flow to ground level. At the bottom, splash blocks or underground drain extensions direct water several feet away from the foundation.
Most residential gutters in the U.S. are made of aluminum, though vinyl, steel, copper, and zinc are also used. The standard profile is a 5-inch K-style gutter for most homes, with 6-inch versions used on larger roofs or in high-rainfall regions. Gutters are fastened to the fascia board - the flat board running along the roofline - using hidden hangers or spikes. That connection point matters: a loose hanger is often the first thing to fail. To understand how gutter problems can compound into larger roofing issues, see our article on how minor roof damage escalates.
The Most Common Gutter Failure Points
Gutters fail in predictable ways. Knowing the failure modes makes it much easier to catch problems early.
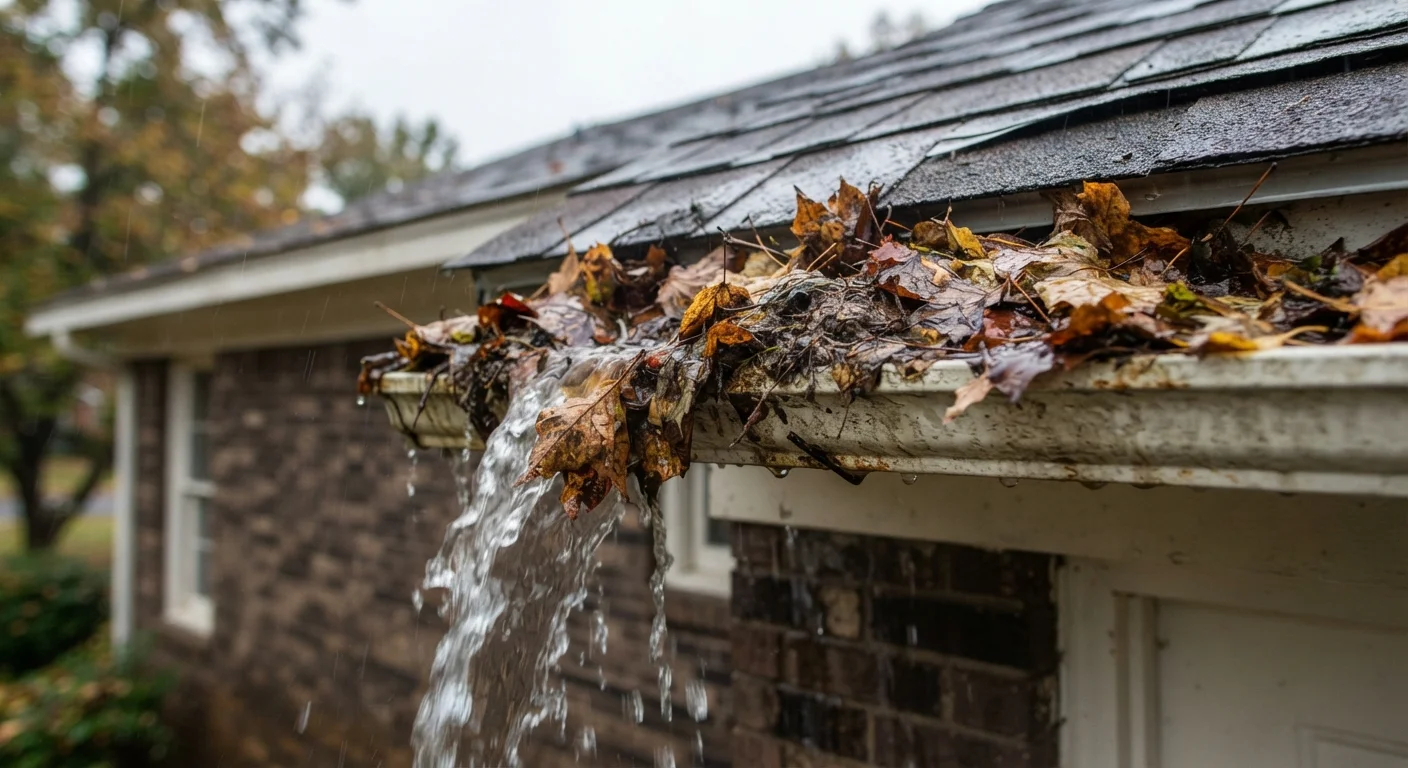
- Clogs: Leaves, seed pods, roof grit, and debris accumulate in the trough and at downspout openings. Once clogged, water backs up, sits stagnant, and eventually overflows - often right at the foundation.
- Improper pitch: Gutters need a slight slope - roughly ¼ inch of drop per 10 feet of run - toward the downspout. If sections sag or were installed flat, water pools rather than drains.
- Failed fasteners: Spikes work loose over time; hidden hangers can pull away from a deteriorating fascia board. Sagging sections are the visible result.
- Leaking seams and end caps: Sectional gutters are joined with sealant. That sealant eventually cracks, allowing water to drip directly onto the fascia below.
- Downspout blockages: Debris that passes the trough often jams at elbows inside the downspout. Water then backs up into the gutter even if the trough itself is clear.
- Incorrectly positioned downspout extensions: Even a functioning gutter system can damage a foundation if the discharge point empties too close to the house.
After flushing the gutter, mark any section where water sits with a piece of tape on the outside of the trough. That marks exactly where to re-hang or shim the bracket to restore pitch - far easier than guessing when you're back down on the ground.
Identifying pitch problems while water is still visible saves a second trip up the ladder and ensures the adjustment is made at precisely the right location.
Check your downspout outlets first when troubleshooting an overflow - roughly 80% of gutter backups originate at the downspout elbow or outlet, not in the trough itself.
Debris that clears the trough tends to jam at direction changes. Targeting the downspout first saves unnecessary trough cleaning when the actual blockage is lower in the system.
Signs Your Gutters Are Already Struggling
Gutters don't announce their problems loudly. Look for these indicators during or after a rain event:
- Water spilling over the front edge of the gutter, especially mid-span (suggests a clog or sag)
- Water dripping behind the gutter, between it and the fascia (suggests a failed rear seal or improper pitch)
- Staining or rot on the fascia board or soffit below the gutter
- Soil erosion or mulch displacement directly below the roofline
- Pooling water near the foundation after rain
- Rust stains or paint peeling on the exterior siding beneath gutter seams
- Gutter sections visibly pulling away from the roofline
Pooling near the foundation deserves special urgency - prolonged soil saturation is a leading cause of basement water intrusion and crawl space moisture. Our guide on crawl spaces and hidden moisture problems explains what that excess moisture can trigger out of sight.
How to Clean and Inspect Your Gutters
Cleaning gutters twice a year - once in late spring and once in late fall after leaves have dropped - handles the majority of routine maintenance. Here is a reliable process:
- Set up safely. Use a stable extension ladder with stand-off stabilizers to keep the ladder away from the gutter itself. Never lean a ladder against the gutter trough - it can deform or pull free. Work with a helper when possible.
- Remove debris by hand. Wearing work gloves, scoop out leaves and sediment from the trough, working toward the downspout. A small plastic scoop or garden trowel helps. Place debris in a bucket hung from the ladder rather than tossing it onto the roof or ground.
- Flush the gutter. Use a garden hose, starting at the far end from the downspout. Flush toward the outlet while checking that water drains quickly. Slow draining confirms a pitch problem or downspout blockage.
- Clear the downspout. Direct the hose into the top of the downspout at full pressure. If water backs up, a plumber's snake or a downspout-specific pressure nozzle can dislodge the clog.
- Inspect while you're up there. Check hangers and spikes, probe the fascia board for soft spots (indicating rot), look at seams and end caps for cracked sealant, and confirm the gutter slope looks correct - water should not be sitting in the trough after flushing.
Gutter cleaning fits naturally into a broader seasonal inspection routine. Our spring home maintenance checklist includes gutters alongside roofing, exterior, and HVAC tasks.
Preventive Maintenance That Reduces Future Work
A few targeted steps between cleanings can significantly extend the intervals between major work:
- Gutter guards: Mesh or micro-mesh covers sit over the trough opening and block large debris while allowing water through. They are not maintenance-free - fine particles, shingle grit, and pine needles still accumulate on the surface and require periodic rinsing - but they substantially reduce full cleanouts for most homeowners.
- Reseal seams proactively: If a seam looks thin or is showing hairline cracks, apply a bead of gutter sealant (a flexible, waterproof product designed for metal gutters) before it opens fully. This is far easier than waiting for an active leak.
- Re-anchor sagging sections: Replace loose spikes with gutter screws, which grip the fascia much more securely. Gutter screws are inexpensive and a straightforward DIY repair for most homeowners comfortable on a ladder.
- Extend downspout discharge: Add plastic or corrugated extensions to carry water at least 4-6 feet from the foundation. In some situations, underground drainage pipes direct water even further away or toward a dry well.
Being proactive about gutters also helps you avoid some of the common oversights described in our piece on home maintenance myths that lead to expensive mistakes. If you're newer to home upkeep overall, our beginner's introduction to home maintenance covers how to prioritize tasks and decide when DIY is appropriate.
When to Call a Professional
Not every gutter task belongs on a homeowner's to-do list. Consider hiring a licensed contractor or gutter specialist for:
- Any work on a two-story or taller roofline where ladder height becomes genuinely hazardous
- Fascia or soffit replacement - these boards may be structurally connected to roof framing and their repair requires carpentry skill
- Full gutter replacement, especially if transitioning to seamless gutters (which are fabricated on-site and require specialty equipment)
- Underground drainage installation, which may require permits depending on your municipality
- Situations where downspout routing ties into the home's foundation drainage system
When evaluating contractors, ask for proof of liability insurance, request an itemized written estimate before any work begins, and ask specifically how they handle fascia repairs if they find rot during the job. A reputable contractor will document problems with photos and explain options clearly without pressuring you toward unnecessary upgrades.
This article is for general informational and educational purposes only. Home repair tasks involve physical risks; always assess your own comfort level and physical ability before working on a ladder. Verify local permit requirements with your municipality before undertaking drainage or structural work. Consult a licensed contractor for tasks beyond your skill level.
The content on this site is for informational purposes only and is not a substitute for professional advice. Always consult a qualified professional for guidance specific to your situation.